Common Problems With Diecast Aircraft Models: Repairs, Damage & Zinc Rot
Diecast aircraft models are designed primarily for display, but their fine components, painted surfaces and removable accessories can become damaged through handling, storage, transport or age. Even a model that has spent most of its life inside its original packaging may develop paint wear, loose components or marks caused by contact with the internal tray.
Some problems can be improved with a careful minor repair, while others are better left untouched. An unnecessary or poorly completed repair may cause further damage, reduce originality and make the defect more noticeable.
This guide covers common problems found on pre-owned diecast aircraft models, how they may affect condition and when a repair should or should not be attempted.
For help assessing the severity of a defect, read our diecast aircraft model grading guide or view the condition grading system used by The Collectables Vault.
Paint Chips and Edge Wear
Paint wear is one of the most common condition problems found on diecast aircraft models.
It often appears around exposed areas such as:
- Wing leading and trailing edges
- Wing tips
- Nose sections
- Propeller tips
- Tailplanes and stabilisers
- Undercarriage doors
- Pylons and weapon attachments
- Areas that contact internal packaging
Small paint chips may result from handling, while longer areas of rubbing can be caused by the model moving inside its packaging. Models with tight plastic trays or painted surfaces resting against internal supports can be particularly vulnerable.
Minor wear does not necessarily prevent a model from displaying well. However, the damage should be photographed clearly and considered when assigning a condition grade.
Should Paint Wear Be Repaired?
Touching in damaged paint can sometimes make a model look better from a distance, but it may also create an obvious colour or finish mismatch.
Factory paint may have a particular shade, sheen and application method that is difficult to reproduce accurately. A repair that appears acceptable under normal room lighting may become much more noticeable in close-up photographs or under bright studio lighting.
For a collectable model, a small area of honest original paint wear is often preferable to an obvious or poorly matched repaint. Any paint retouching should always be disclosed when the model is sold.

Paint wear along the leading edge of a diecast aircraft model wing
Paint Rubbing From Packaging
Paint rubbing can occur when part of the model repeatedly contacts its plastic tray, foam insert, protective sheet or another component inside the box.
This can create:
- Polished or unusually glossy patches
- Dull areas in the paint finish
- Colour transfer onto the packaging
- Exposed metal along an edge
- Marks on wings, tails or fuselage sections
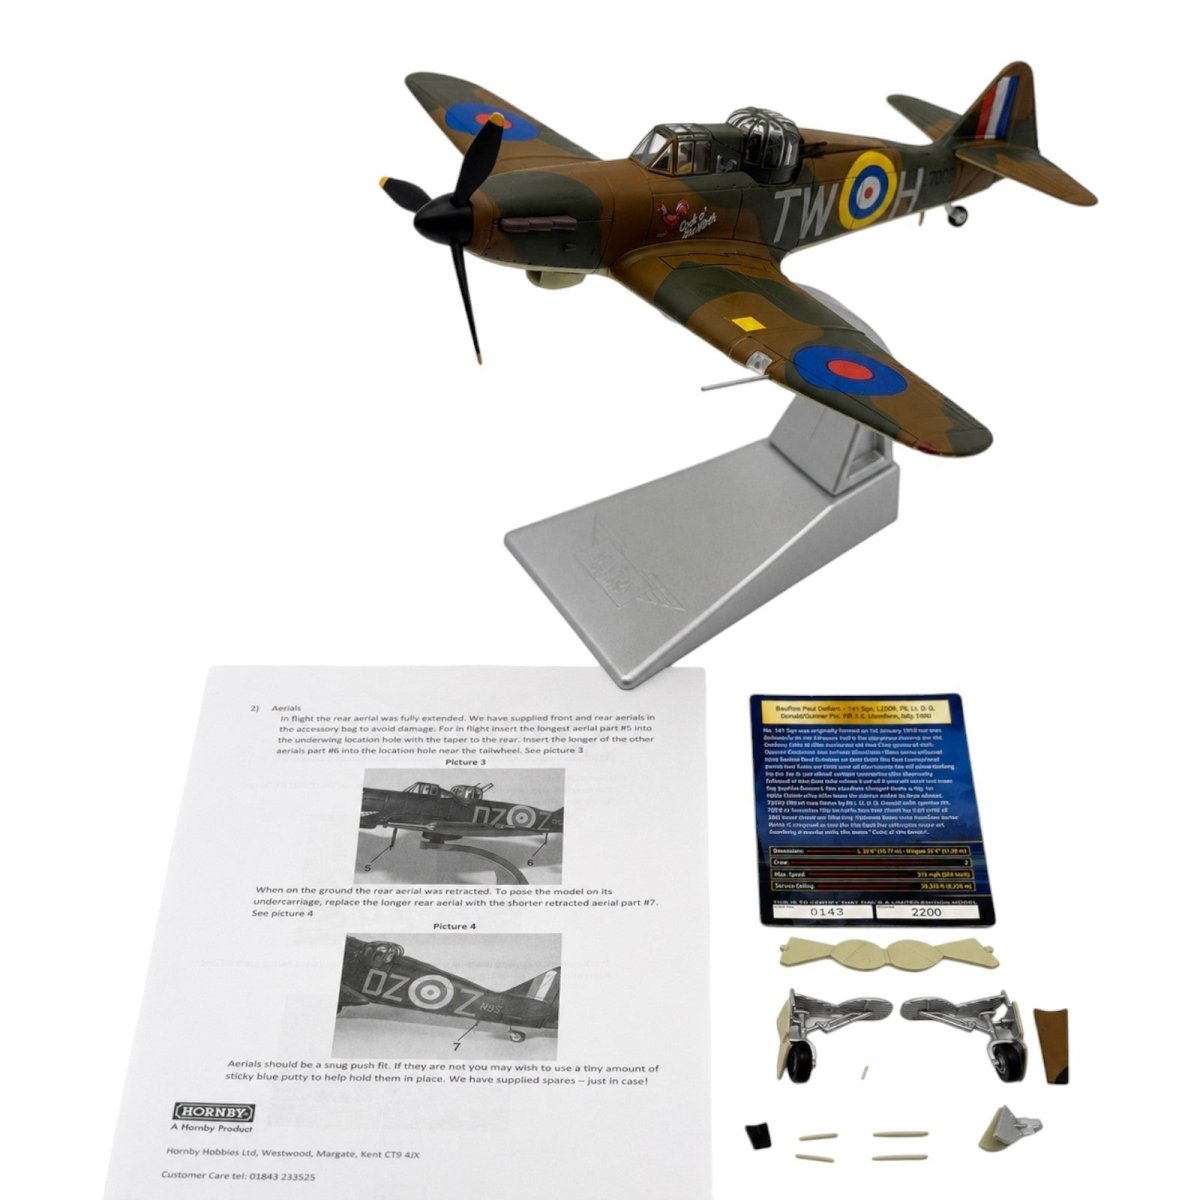
Hobby Master aircraft can require particular care when being removed from tightly fitted plastic packaging. Pulling the aircraft directly upwards may cause painted surfaces, aerials or other delicate components to rub against the tray.
Where possible, remove the upper packaging slowly and support the model from a strong central section of the airframe. Avoid pulling on wings, aerials, propellers, weapons or undercarriage components.
More information about the packaging and removable parts commonly supplied with these models can be found in our guide to Hobby Master diecast aircraft.

This example shows paint loss along the wing edge where the aircraft has rubbed against its internal blister packaging. Tight-fitting trays can mark a model even when it has remained boxed.
Paint Bubbling, Lifting and Cracking
Paint bubbling, lifting and cracking are related surface problems, but they do not always have the same cause or level of severity.
Paint bubbling appears as small raised areas beneath the painted surface. Paint cracking usually appears as fine lines running through the finish, while lifting occurs when the paint begins to separate from the metal casting.
Possible signs include:
- Small raised bubbles beneath the paint
- Fine hairline cracks or a web-like pattern
- Longer splits running across painted panels
- Flaking around the affected area
- A rough or uneven surface
- Paint lifting away from the metal casting
- Exposed metal where the finish has broken away

Paint bubbling can appear as small raised areas beneath the surface finish. It should not be pressed or scraped, as this may cause the surrounding paint to break away.
What Does Paint Cracking Look Like?
Paint cracking can begin as a network of very fine lines that may only become visible under bright lighting or close inspection. This fine surface cracking is sometimes described as paint crazing.
As the problem becomes more noticeable, the lines may spread across a larger section of the model or develop into wider splits. In more advanced cases, the paint may begin to lift or flake away along the cracks.
Cracking may be found around areas such as:
- Nose sections
- Fuselage joints
- Wing roots
- Curved panels
- Areas with thicker paint coverage
- Sections placed under pressure by internal packaging
Fine cracking may remain largely cosmetic where the model is still correctly shaped, solid and free from distortion. However, widespread cracking or paint that is visibly lifting will normally have a greater effect on condition and value.

Fine paint cracking may initially appear as a network of very thin lines across the surface. The underlying casting should also be checked for swelling or distortion before assuming that the damage is zinc rot.

More extensive cracking can spread across a larger painted section and become clearly visible even without magnification. Widespread cracking will normally have a greater effect on condition and value.
What Can Cause Paint Cracking?
Paint cracking may develop as the finish ages, loses flexibility or fails to remain evenly bonded to the surface beneath it. Changes in temperature, long-term storage conditions, pressure from packaging and slight movement between joined sections may also contribute.
It is not always possible to identify the exact cause from appearance alone. Two models stored in similar conditions may age differently because of variations in paint application, surface preparation or the production batch.
Should Bubbling or Cracked Paint Be Repaired?
Bubbling, cracking or lifting paint should not be pressed, scraped, punctured or peeled. Disturbing the affected area may remove the surrounding finish and turn a small defect into a much larger patch of paint loss.
Touching in the area with replacement paint may improve its appearance from a distance, but it will not correct poor adhesion beneath the original finish. Any repainting or restoration should also be disclosed if the model is later sold.
The severity should be assessed carefully. Light bubbling or fine cracking may have relatively little effect on the model’s appearance from a normal viewing distance, while widespread cracking, lifting or flaking can considerably reduce its condition and value.
Where the cracking appears to extend beyond the painted finish or is accompanied by distortion or structural weakness, the underlying casting should be inspected more closely.
Zinc Pest or Zinc Rot: A Serious Concern in Older Diecast Models
Zinc pest, also known as zinc rot, mazak rot or zamak rot, is one of the most serious problems that can affect an older diecast model.
Unlike ordinary paint wear or surface oxidation, zinc rot affects the metal casting itself. The zinc alloy gradually becomes unstable, expands and weakens. Once the casting starts to deteriorate, the damage cannot be corrected with glue, filler or repainting.
Possible warning signs include:
- Cracks appearing through the metal casting
- Swelling or distortion of the fuselage, wings or base
- Paint splitting as the metal underneath expands
- Warped parts that no longer align correctly
- Mounting posts or screw points breaking apart
- A rough, granular or unusually brittle surface
- Pieces separating without obvious impact damage
- Sections of the casting beginning to crumble
Zinc rot is particularly concerning because a model may initially show only a small crack or slight distortion. As the metal continues to weaken, larger sections can fracture and the model may eventually become impossible to handle safely.
Older models should be inspected carefully around:
- Wing roots
- Fuselage seams
- Undercarriage mounting points
- Screw posts and fixing points
- Thin tail and stabiliser sections
- Areas where separate metal castings join
- Sections already showing cracked or lifted paint
Can Zinc Rot Be Repaired?
There is no dependable repair that restores deteriorating zinc alloy. Glue may temporarily hold a broken section together, but it will not stop the surrounding metal from continuing to weaken.
Do not attempt to force a warped part back into shape. Affected alloy can be extremely brittle and may fracture suddenly under pressure.
If zinc rot is suspected:
- Handle the model as little as possible
- Do not support its weight using weakened undercarriage
- Keep loose fragments and original parts together
- Photograph the affected areas for comparison
- Store the model somewhere dry with stable temperature and humidity
- Keep it away from pressure, heavy boxes or tightly fitted packaging
Stable storage may help reduce additional environmental stress, but it will not reverse damage already present within the alloy.
How Zinc Rot Affects Collectability and Value
Zinc rot normally has a substantial effect on value because it is a structural problem rather than a minor cosmetic imperfection.
A rare model may still have value as a reference piece, restoration project or source of unaffected accessories. However, anyone buying the model must be made fully aware of the deterioration and the possibility that it may worsen over time.
Not every old diecast model will develop zinc rot, and apparently identical models may survive differently depending on the metal batch used during production. This makes careful inspection especially important when purchasing older or previously stored collections.
Loose or Detached Parts
Many diecast aircraft models include components attached using small locating pins, slots, screws or factory-applied adhesive.
Common loose or detached parts include:
- Aerials and antennas
- Pitot tubes
- Tailplanes
- Vertical stabilisers
- Propellers and spinners
- Undercarriage doors
- Pylons
- Missiles, bombs and fuel tanks
- Canopies
- Small sensors or probes
Before applying adhesive, check whether the component is genuinely broken. Some parts are designed to be removable, interchangeable or held in position only when the model is displayed in a particular configuration.
Inspect the locating pin and mounting hole closely. A part may sit loosely because:
- The mounting hole is too shallow
- The locating pin is bent
- The pin has partially snapped
- Old adhesive remains inside the hole
- The component is a replacement from another release
- The part has been fitted in the wrong position
Older Corgi Aviation Archive models may use a mixture of metal and plastic detail parts, depending on the aircraft and production period. Our Corgi Aviation Archive guide explains more about the range and the features collectors commonly encounter.
Choosing Adhesive for a Minor Repair
No single adhesive is suitable for every diecast aircraft repair.
The correct choice depends on:
- The materials being joined
- The weight of the detached component
- The size of the contact area
- Whether the part may need to be removed later
- How visible the joint will be
- Whether the surrounding paint could be damaged
A very small amount of adhesive is normally safer than applying a large quantity. Excess glue can spread around the joint, damage paintwork, block a mounting hole or leave a glossy residue.
Fast-setting superglue should be used with particular caution. It can mark painted surfaces, produce white fogging around clear plastic and set before the component has been positioned correctly.
Never apply adhesive directly from a large bottle onto the model. Place a small amount onto a disposable surface first, then transfer only the required amount using a fine applicator.
Where the original mounting pin remains intact, a less permanent adhesive may be enough to hold a lightweight component securely without creating an irreversible repair.
Glue Residue and Previous Repairs
Older or pre-owned models may already show evidence of previous repairs.
Look for:
- Shiny adhesive around a joint
- White fogging near a canopy or clear part
- Thick deposits of dried glue
- Misaligned components
- Fingerprints in the finish
- Paint pulled away from a repaired area
- Components fitted in the wrong position
- Parts that have been permanently glued despite originally being removable
A repaired part may still be secure and allow the model to display well. However, a previous repair should be included in the condition description because it affects originality.
Attempting to remove hardened adhesive can cause more damage than leaving it in place. Solvents may soften the surrounding paint, cloud clear plastic or remove printed markings and decals.

Visible glue residue around a joint can indicate a previous repair. Attempting to remove hardened adhesive may damage the surrounding paint or plastic, so it is often safer to leave the area untouched.
Bent Aerials, Antennas and Pitot Tubes
Fine aerials, antennas and pitot tubes are easily bent during handling or when the model is removed from its packaging.
Plastic parts may flex slightly, while thin metal components can retain a visible bend.
Do not repeatedly bend a component backwards and forwards. Repeated movement weakens the material and may cause the part to snap at its base.
A very minor bend may be better left alone, particularly when the component is secure and the model still displays well. Straightening should only be attempted when the material, attachment point and direction of the bend are clearly understood.
Do not use the aerial or pitot tube as a lifting point when removing the aircraft from its box.
Damaged Undercarriage
Undercarriage components can be among the most vulnerable parts of a diecast aircraft model.
Common problems include:
- Bent landing gear
- Loose or detached wheels
- Misaligned undercarriage legs
- Broken mounting pins
- Missing undercarriage doors
- Wheels sitting at incorrect angles
- Components glued permanently into position
- Incorrect replacement parts from another model
A heavy diecast model should never be supported by damaged or partially fitted undercarriage. Doing so may enlarge the mounting hole, distort the leg or cause the component to break completely.
Where a display stand is available, it may provide a safer alternative until the undercarriage can be assessed.
Replacement undercarriage components should be checked carefully because similar aircraft releases may use different colours, wheel designs, door markings or locating pins.
Missing Weapons, Accessories and Spare Parts
Missiles, bombs, fuel tanks, undercarriage pieces and removable pylons are easily lost because they are often stored separately from the aircraft.
Before assuming a component is missing, check:
- The underside of the internal packaging
- Small clear accessory bags
- Polystyrene recesses
- Instruction sheets
- Beneath removable trays
- Inside the display stand compartment
- The aircraft itself, as the component may already be fitted
A replacement accessory may allow the model to display correctly, but it may not be original to that exact release.
Differences between apparently similar accessories can include:
- Colour
- Printed markings
- Locating-pin size
- Weapons configuration
- Shape and dimensions
- The plastic or metal used

This example shows several completeness issues, including a missing missile, underwing pylon and undercarriage door. Missing accessories may affect both display appearance and collector value.
Contacting the Manufacturer for a Missing Spare
It is always worth contacting the original manufacturer when an accessory or small component is missing. The company may have replacement parts, returned stock or compatible components available.
For Corgi models, enquiries can be submitted through the official Corgi customer services page.
For Hobby Master models, contact details are available through the official Hobby Master website.
When contacting a manufacturer, include:
- The complete model code
- The aircraft name and scale
- A photograph of the model and box label
- A clear photograph of the missing or damaged area
- A description of the exact component required
- Proof of purchase where available
Replacement parts are not guaranteed. Older or discontinued models may no longer have any spares available, and some manufacturers do not retain individual accessories once a production run has ended. A component may also have been produced as part of a complete assembly rather than as a separately stocked spare.
If the model was purchased recently, it may also be worth contacting the original retailer before attempting a repair. The retailer may be able to arrange a replacement, return or spare-part request on your behalf.
Any replacement obtained from another model should be described accurately. It may be compatible and allow the aircraft to display properly without being original to that particular release.
Damaged or Clouded Canopies
Clear canopies can become scratched, cloudy or marked by adhesive.
Common causes include:
- Cleaning with an abrasive cloth
- Contact with internal packaging
- Superglue fumes
- Fingerprints
- Household cleaning products
- Previous attempts at polishing
Avoid using general household cleaners on clear plastic. They may react with the material or affect the surrounding paint and printed details.
A soft, clean cloth can be used to remove loose dust, but deeper scratches or adhesive fogging may require specialist restoration. On a rare or valuable model, leaving the canopy untouched may be safer than risking permanent damage.
Propeller Problems
Propeller-driven aircraft may suffer from:
- Bent blades
- Broken blades
- Loose spinners
- Paint wear on blade tips
- Propellers that no longer rotate
- Propeller assemblies fitted incorrectly
A propeller should not be forced to rotate. Some models have fixed propellers, while others may become stiff with age or because of paint and adhesive around the mounting point.
When handling the aircraft, support the fuselage rather than lifting the model by the propeller or spinner.
A broken blade can sometimes be reattached, but the repair area is usually small and exposed. Alignment is particularly important because even a slight difference in angle may remain noticeable when the aircraft is viewed from the front.
Box and Internal Packaging Damage
The original box and internal packaging are often important parts of a collectable diecast model.
Common packaging problems include:
- Edge and corner wear
- Surface rubbing
- Paper loss
- Creases
- Tears
- Crushed sections
- Sun fading
- Water damage
- Split plastic trays
- Damaged polystyrene
- Missing protective inserts
Packaging should be assessed separately from the model itself. An aircraft may be in excellent condition while its box has substantial wear.
Damaged internal packaging can also place the model at risk. A split tray, missing support or loose polystyrene section may allow the aircraft to move during transport and cause additional paint wear or broken parts.
A model with damaged packaging should be supported carefully before shipping rather than relying entirely on the original tray.

Heavy surface wear can remove the printed outer layer of a model box and expose the cardboard beneath. Packaging condition should be assessed separately from the condition of the model itself.
When Is a Repair Worth Attempting?
A minor repair may be reasonable when:
- The original detached part is present
- The break is clean
- The locating point remains intact
- The repair can be completed without disturbing surrounding paint
- The component can be aligned accurately
- The model is primarily intended as a display piece
Leaving the model untouched may be safer when:
- The repair involves clear plastic
- Paint is already lifting or cracking
- The component is extremely fine
- Old adhesive must be removed first
- The repair would require drilling or repainting
- The model is rare or especially valuable
- Zinc rot or structural deterioration is suspected
- There is a significant risk of causing further damage
The aim should not always be to make the model appear perfect. Preserving its current condition and originality can be more important than disguising every imperfection.
How Repairs Affect Value
A repaired model will generally be worth less than an equivalent untouched example in the same apparent condition.
The effect on value depends on:
- The importance of the repaired component
- How visible the repair is
- Whether the original part was used
- The quality and stability of the repair
- The rarity of the release
- Whether the model remains complete
- Whether the repair has been clearly disclosed
A clean repair to a small aerial may have a limited effect, while a glued wing, stabiliser, canopy or undercarriage assembly will normally be more significant.
Rare models can remain desirable despite repairs, particularly when complete examples are difficult to find. However, the description and photographs should allow the buyer to make a properly informed decision.
Examples of older and discontinued releases can be explored through our previously sold models archive.
Document the Condition Before Repairing
Before attempting any repair, take clear photographs showing:
- The damaged area
- The detached component
- The locating point or mounting hole
- Any existing adhesive
- The surrounding paintwork
- The complete model
This creates a record of the original condition and may help establish how the component was fitted.
Keep detached original pieces even when they cannot be reattached immediately. A future owner may prefer to have the original component rather than an incorrect replacement.
Final Thoughts
Minor faults are common on pre-owned diecast aircraft models, particularly where an aircraft has been displayed, transported or removed from its packaging several times.
Paint wear, loose accessories and small detached components do not always prevent a model from displaying well. Repairs should still be approached carefully. A rushed attempt can produce glue residue, damaged paint or misaligned components that are more noticeable than the original fault.
Zinc rot should be treated much more seriously than ordinary cosmetic wear. Cracking, swelling, warping or crumbling of the metal casting may indicate irreversible deterioration rather than damage that can be solved with a conventional repair.
Before altering a model, consider its rarity, value, originality and intended use. For many collectable models, an honest condition description and clear photographs are preferable to an uncertain repair.
You can browse our current diecast aircraft model collection, explore models from other diecast aircraft manufacturers, or discover more advice through our collector guides and histories.

Written by Jay Sawyer